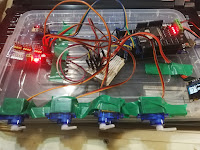
This article is based on the article with same name and Railway Crossing Part 4: Putting it all Together article.
My tests included few models until at last version with sounds (warnings) and other count method for trains, but main structures are same:
- Railway_Crossing_1 (just added tip and free lights), sketch: us_barriers_rudysarduinoprojects_1b.ino
- Railway_Crossing_2 (added sounds using Mike Osborn MKO tips),sketch: bell_and_button_servo_4- Railway_Crossing_3 (added sounds and test different count methods: original with few updates or big changes)
with 3 sketches and last improved sketch:
with this schematic (LCD1602 with i2c interface is not added)- Railway Crossing with lights and sounds for Multi Track Two Way
but at least a train is between sensors, barriers (gates) are closed: If no train between IR sensors, barriers (gates) are open:
29.08.2022
I changed the sketch for remove sound after gate is open (us_barriers_2b_2)
as Jedidiah Sawyer wanted.
You can see video named Arduino Railway Crossing with sounds (video by Jedidiah Sawyer):
Last change of the sketch is to have also fading light as in 2nd Avenue Railroad Crossing, Clanton, AL
so, last sketch is us_barriers_2b_3
and a short video made by Jedidiah Sawyer:
31.08.2022
The variable for change the fade effects are:
and the fade for LED3 is
so, LED3 is off (brightness = 0), than after 200ms (variable time_to_stop) brightness increased at 1 (variable fadeAmount), than after 2 ms (variable fade_delay) brightness is 2, after more 2ms brightness is 4, etc, until brightness is 255 (maximum = 100%) .. is a pause (time_to_stop = 200ms) and after that brightness decrease with 1 at every 2ms until 0...
Leds for blink effect (LED1 and LED2) are same period as fadding leds (LED3and LED4):
..so, you can change the values as you want,...


